https://docs.bullmq.io/
https://medium.com/@mjdrehman/setting-up-a-job-queue-in-node-js-with-bullmq-and-redis-in-5-minutes-0f170928c0b5
https://docs.bullmq.io/
https://medium.com/@mjdrehman/setting-up-a-job-queue-in-node-js-with-bullmq-and-redis-in-5-minutes-0f170928c0b5
https://medium.com/@debiprasaddash_35810/node-js-design-patterns-8969d9184e37
To run several versions at the same time. In pm2, you can use the --interpreter options and specify the path to the node version you want.
You may install different node versions using nvm.
Install NodeJS using Version Manager
Running direct script using PM2 process file:
module.exports = {
apps : [{
name : "app1",
cwd : "/home/user/app1", // folder store the application
script : "./app.js", // starting js file
interpreter : 'node@6.9.1' // Node version
},
{
name : "app2",
cwd : "/home/user/app2",
script : "./app.js",
interpreter : 'node@12.9.1'
}]
}
Running using npm script using PM2 process file:
module.exports = {
apps : [{
name : "app1",
cwd : "/home/user/app1", // folder store the application
script : "/home/user/.nvm/versions/node/v6.9.1/bin/npm", // Folder where the npm stored
args : ["run", "start"], // Argument pass to npm
interpreter : 'node@6.9.1' // Node version
},
{
name : "app2",
cwd : "/home/user/app2",
script : "/home/user/.nvm/versions/node/v12.9.1/bin/npm",
args : ["run", "start"],
interpreter : 'node@12.9.1'
}]
}
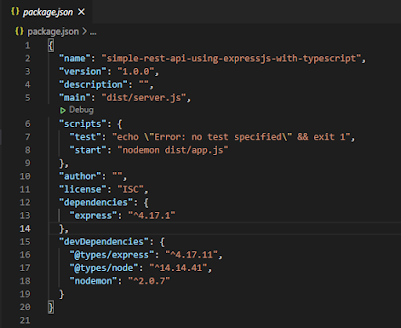
In my previous article, I have described how to create a simple typescript nodejs project. The method works fine in a small project, but take longer compilation time on a large project because its need to compile all typescript files on every change.
Create Node.js & Express.js with Typescript Project
The solution is using ts-node where it direct run the typescript without compiling it to javascript.
NodeJs Best Practices
https://medium.com/@quraanmaram/nodejs-best-practices-5793375c3ad8
API Architecture — Design Best Practices for REST APIs
https://abdulrwahab.medium.com/api-architecture-best-practices-for-designing-rest-apis-bf907025f5f
10 best practices every Node.js developer must follow
https://medium.com/dhiwise/10-best-practices-every-node-js-developer-must-follow-32072950a5ac
- Further research on google styles guide and logger tools.
Basics of CI/CD
https://levelup.gitconnected.com/basics-of-ci-cd-a98340c60b04


This testing is running on 12GB RAM Window PC. NodeJS, MongoDB and Redis are installed on standalone PC.
The test is querying 10,000 documents.
It takes 1005ms response time query from MongoDB Server.


Are you interested in live scoreboard build with Redis Sorted Set and Socket Programming? Feel free to let me know, probably my next sharing.
I have shown an example of a direct approach on how to use Redis on NodeJS in Part 1. The disadvantage of the direct approach is redundant code where you have to initial Redis Server and to check whether there is a cache whenever you use it.
In this part 2, I am going to centralise the intitial Redis Server and add new method in mongoose:
.cache() = Cache value into redis memory database.
clearCache() = Delete value from redis memory database.
You can download the code at https://github.com/htsiah/node-redis-mongodb
The Redis Code store in utils/useCacheUtil.js and the sample code at controllers/TeacherController.js

Local Machine Implementation:
Transactions only work on replicate sets. So, the first step is to convert your standalone MongoDb instance to single replicate set.
After converting to replicate set, we can work on the NodeJs code.
Docker Implementation:
Create a model:
const StudentModel= mongoose.model('StudentModel', new mongoose.Schema({
year: { type: Number },
standard: { type: Number },
}));
Example of saving a document using transaction:
For full example of transaction in MVC, you can refer below repository.const createStudent = async (req, res, next) => {
const { year, standard } = req.body;
const session = await StudentModel.startSession();
session.startTransaction();
const newStudent = new StudentModel({
id: uuidv4(),
year: year,
standard: standard,
})
try {
const opts = { session };
await newStudent.save(opts);
// commit the changes if everything was successful
await session.commitTransaction();
session.endSession();
} catch (err) {
// If an error occurred, abort the whole transaction and
// undo any changes that might have happened
await session.abortTransaction();
session.endSession();
const error = new Error(' Creating document failed.');
return next(error);
}
res.status(201).json(newStudent);
};
NodeJS is single thread, meaning a request must be completed before it can execute another request. This example demonstrates how inefficient in NodeJS: https://github.com/htsiah/node-performance-using-cluster/tree/main/blocking-the-event-loop
To improve the performance, we can implement cluster where you can fork as many as child processes. The rule of thumb is the child can not more than logical CPU. You can download the cluster implementation here. https://github.com/htsiah/node-performance-using-cluster/tree/main/cluster-in-action
This article explains the number of child process and thread vs the logical CPU: https://dev.to/johnjardincodes/increase-node-js-performance-with-libuv-thread-pool-5h10
PM2 is a NodeJS cluster package. This package used in many production environments. I recommend PM2 instead of reinventing the wheel. The above example is to let you understand how the cluster works.
First, you need to install PM in the global environment by using the command: npm install -g pm2
To start the application using pm2: pm2 start app.js -i -1 (-1 is maximum child process.)
To show all the process: pm2 list
To delete the process: pm2 delete app
More refer to https://www.npmjs.com/package/pm2
Often Node.js can be installed with a particular Operating System's official or unofficial package manager. For instance apt-get on Debian/Ubuntu, Brew on macOs, Chocolatey on Windows. It is strongly recommended against using this approach to install Node. Package managers tend to lag behind the faster Node.js release cycle. Additionally, the placement of binary and config files and folders isn't standardized across OS package managers and can cause compatibility issues.
The popular version manager are nvm (macOS and Linux), nvm-windows (windows) and nvs (macOS, Linux and windows).
https://github.com/coreybutler/nvm-windows
https://github.com/jasongin/nvs
I prefer nvs because of cross-platform. I am a window user and my server is Ubuntu.
Comparing nvm and nvs, I have feedback from a developer saying that nvm is slower.


