https://docs.bullmq.io/
https://medium.com/@mjdrehman/setting-up-a-job-queue-in-node-js-with-bullmq-and-redis-in-5-minutes-0f170928c0b5
https://docs.bullmq.io/
https://medium.com/@mjdrehman/setting-up-a-job-queue-in-node-js-with-bullmq-and-redis-in-5-minutes-0f170928c0b5
https://medium.com/@debiprasaddash_35810/node-js-design-patterns-8969d9184e37
Strorybook is something to try out.
https://storybook.js.org/
https://javascript.plainenglish.io/10-powerful-react-tools-that-you-should-know-in-2022-76efa7fa711d
https://medium.com/@jakobclausen/usememo-and-usecallback-in-react-913d307eb69
To run several versions at the same time. In pm2, you can use the --interpreter options and specify the path to the node version you want.
You may install different node versions using nvm.
Install NodeJS using Version Manager
Running direct script using PM2 process file:
module.exports = {
apps : [{
name : "app1",
cwd : "/home/user/app1", // folder store the application
script : "./app.js", // starting js file
interpreter : 'node@6.9.1' // Node version
},
{
name : "app2",
cwd : "/home/user/app2",
script : "./app.js",
interpreter : 'node@12.9.1'
}]
}
Running using npm script using PM2 process file:
module.exports = {
apps : [{
name : "app1",
cwd : "/home/user/app1", // folder store the application
script : "/home/user/.nvm/versions/node/v6.9.1/bin/npm", // Folder where the npm stored
args : ["run", "start"], // Argument pass to npm
interpreter : 'node@6.9.1' // Node version
},
{
name : "app2",
cwd : "/home/user/app2",
script : "/home/user/.nvm/versions/node/v12.9.1/bin/npm",
args : ["run", "start"],
interpreter : 'node@12.9.1'
}]
}
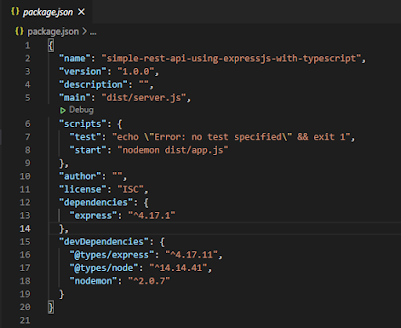
In my previous article, I have described how to create a simple typescript nodejs project. The method works fine in a small project, but take longer compilation time on a large project because its need to compile all typescript files on every change.
Create Node.js & Express.js with Typescript Project
The solution is using ts-node where it direct run the typescript without compiling it to javascript.
NodeJs Best Practices
https://medium.com/@quraanmaram/nodejs-best-practices-5793375c3ad8
API Architecture — Design Best Practices for REST APIs
https://abdulrwahab.medium.com/api-architecture-best-practices-for-designing-rest-apis-bf907025f5f
10 best practices every Node.js developer must follow
https://medium.com/dhiwise/10-best-practices-every-node-js-developer-must-follow-32072950a5ac
- Further research on google styles guide and logger tools.
Basics of CI/CD
https://levelup.gitconnected.com/basics-of-ci-cd-a98340c60b04
Optimistic concurrency is a better way to handle save conflict compare to the article I wrote previously.
https://scalaoncloud.blogspot.com/2021/03/how-to-avoid-save-conflict-in-mongoose.html
Optimistic concurrency tracks the version of the document and increments the version every time save(). If the version of the document in the database changed between when you loaded the document and when you save(), Mongoose will throw an error.
https://mongoosejs.com/docs/guide.html#optimisticConcurrency
https://thecodebarbarian.com/whats-new-in-mongoose-5-10-optimistic-concurrency.html